Marcin Zawada
Backend Developer
2023-10-05
#Development
Time to read
8 mins
In this article
Overview
The stack
Project setup
HTTP server with Marble.js
Let's add some CRUD
Summary
Share this article
Overview
In this article, I'll show you an example of REST API that utilizes RxJS. To achieve this we will use marble.js. To make things simpler and more engaging we will use Bun javascript runtime & toolkit instead of NodeJS.
This series will be composed of three parts.
- In the first part, I'll introduce simple CRUD operations,
- In the second part, we will talk about more advanced things like middleware, custom JWT authorization, and validation,
- In the third part, we will configure the docker-compose environment and add the Mongo database.
In this part, we will cover the following topics:
- first, we'll talk about used stack,
- next, we'll set our environment,
- and finally, we will create some CRUD operations.
Requirements:
- basic understanding of JavaScript and TypeScript,
- a bit of knowledge about functional programming and RxJS.
All project files can be found here: github/bun-rxjs-marble-blog-example
The stack
We will write code in TypeScript which is a superset of JavaScript, which means that all JavaScript code is valid Typescript code. Types and interfaces will become useful when we start piping RxJS functions because it will make sure that the types of piped functions match.
The next thing we mention is RxJS. It is an event-based library for reactive programming. It uses streams and observables. A great example of RxJS usage is the Angular frontend framework. The thing that makes RxJS awesome are operators. They are functions that can be piped together to operate and manipulate streams. If you want to learn more about RxJS I would recommend reading Angular Docs (The RxJS library) and checking https://rxviz.com/ website which visualizes RxJS streams.
Next, Marble.js. It's a server-side framework that uses RxJS under the hood. It provides a toolset and solutions that will allow us to create a simple HTTP server, handle routing, logging, errors, and intercept requests conveniently.
And Bun, which is the next big thing in Javascript. Bun is a NodeJS drop-in replacement that considers itself faster and provides things like bundler, hot reloading, and testing out of the box. Bun is also a package manager that installs npm packages so we can make use of vast existing packages.
I suggest using VSCode IDE with the official Bun extension.
Project setup
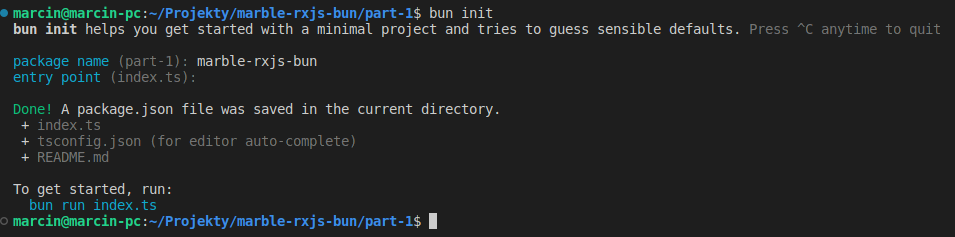
To start with Bun make sure it's installed on your machine. Next, create a directory for your project, and enter it. Type bun init in your terminal, and provide the details you will be asked for.
Bun will create the following files and directories:
- node_modules - contains packages installed locally,
- .gititnore - files ignored by git (for simplicity we won't use git)
- tsconfig.ts - specify TypeScript compiler options
- bun.lockb - a binary lockfile
- README.md - contains an essential guide to running a project
- index.ts - our starting file filled with the "hello world"
Now type bun run index.ts in your terminal and you should see Hello via Bun! printed in your terminal.

Now the painful part. We will configure a bundler, TypeScript, hot-reload, and a testing framework and we will try to make it work... Oh, it's already done! That's where Bun is fun! You are surprised, and so am I.
Now we can continue on to Marble.js!
HTTP server with Marble.js
First, we need to install our dependencies. Type the following command in your terminal:
1bun add @marblejs/core @marblejs/http fp-ts rxjs @marblejs/middleware-body @marblejs/middleware-logger
Now we will set a minimal working server and check if it works. We will modify our index.ts file, and add a src/posts.api.ts file that will home our CRUD later in this article.
It's worth mentioning that Marble.js documentation provides a style guide that recommends putting things in separate files but for the simplicity of this article, we will break that rule.
src/posts.api.ts
First, add a basic endpoint to test our API
1 2 3 4 5 6 7 8 9 10 11 12 13 14import { r } from "@marblejs/http"; import { map } from "rxjs/operators"; export const postsApi$ = r.pipe( r.matchPath("/"), r.matchType("GET"), r.useEffect((req$) => req$.pipe( map(() => ({ body: { data: "Hello, world!" }, })) ) ) );
We can think of an r object as a request stream that we pipe to route requests to the desired effect. Speaking of which, r also provides operators to scope our request. The following functions r.matchPath('/') and r.matchType('GET') define our application routing. The stream is simply filtered and only if the request matches the criteria the stream continues.
1 2 3 4 5 6 7r.useEffect((req$) => req$.pipe( map(() => ({ body: { data: "Hello, world!" }, })) ) )
This part creates a so-called effect. The effect contains a code that will be executed when the route is matched. In this code, we use the map RxJS operator to map our request into a response object that contains the "Hello, World!" string.
index.ts
1 2 3 4 5 6 7 8 9 10 11 12 13 14 15 16 17 18 19 20 21import { createServer, httpListener } from "@marblejs/http"; import { logger$ } from "@marblejs/middleware-logger"; import { bodyParser$ } from "@marblejs/middleware-body"; import { postsApi$ } from "./src/posts.api"; export const listener = httpListener({ middlewares: [logger$(), bodyParser$()], effects: [postsApi$], }); const main = async () => { const server = await createServer({ port: 3000, hostname: "127.0.0.1", listener, }); await server(); } main();
Let's break this down.
1 2 3 4export const listener = httpListener({ middlewares: [logger$(), bodyParser$()], effects: [postsApi$], });
The httpListener function scaffolds a basic listener and allows us to set middleware and combine our APIs. Our API will be composed of a combination of so-called effects.
The logger$ middleware will print logs to the console, and the bodyParser$ middleware will parse a request body giving us access to form data.
1 2 3 4 5 6 7 8 9const main = async () => { const server = await createServer({ port: 3000, hostname: "127.0.0.1", listener, }); await server(); }
The createServer asynchronous function creates a server with given parameters. But this function will not automatically start listening for a given port and host. To do that we must manually call the server as follows:
1await server();
It's time to test our first endpoint! Start two terminals. In the first one run bun --hot index.ts which will run our app and reload it whenever we change something in the code. In the second one run curl "http://localhost:3000" and you should see a response:
1{"data":"Hello, world!"}
From now on I will suggest using the Postman app to test your API as we will add more endpoints and JWT authorization soon.
Let's add some CRUD
For simplicity, we will put all code into a single file src/posts.api.ts
First, import things that we will use in the entire file.
1 2 3import { HttpError, HttpStatus, combineRoutes, r } from "@marblejs/http"; import { of } from "rxjs"; import { map, mergeMap } from "rxjs/operators";
Next, let's define an interface that will describe our post object. We also define the data transfer objects that we will use in update and create operations. We won't have much use for the types now, but they will come in handy in the future
1 2 3 4 5 6 7 8 9export interface Post { id: number; title: string; content: string; createdAt: Date; } export type PostCreateDto = Pick<Post, "title" | "content">; export type PostUpdateDto = Pick<Post, "title" | "content">;
Now, let's define some memory for created posts, add a variable to track created IDs, and add a function to create new IDs.
1 2 3 4 5 6 7const posts: Post[] = []; let lastID = 0; const createID = () => { lastID++; return lastID; }
CREATE
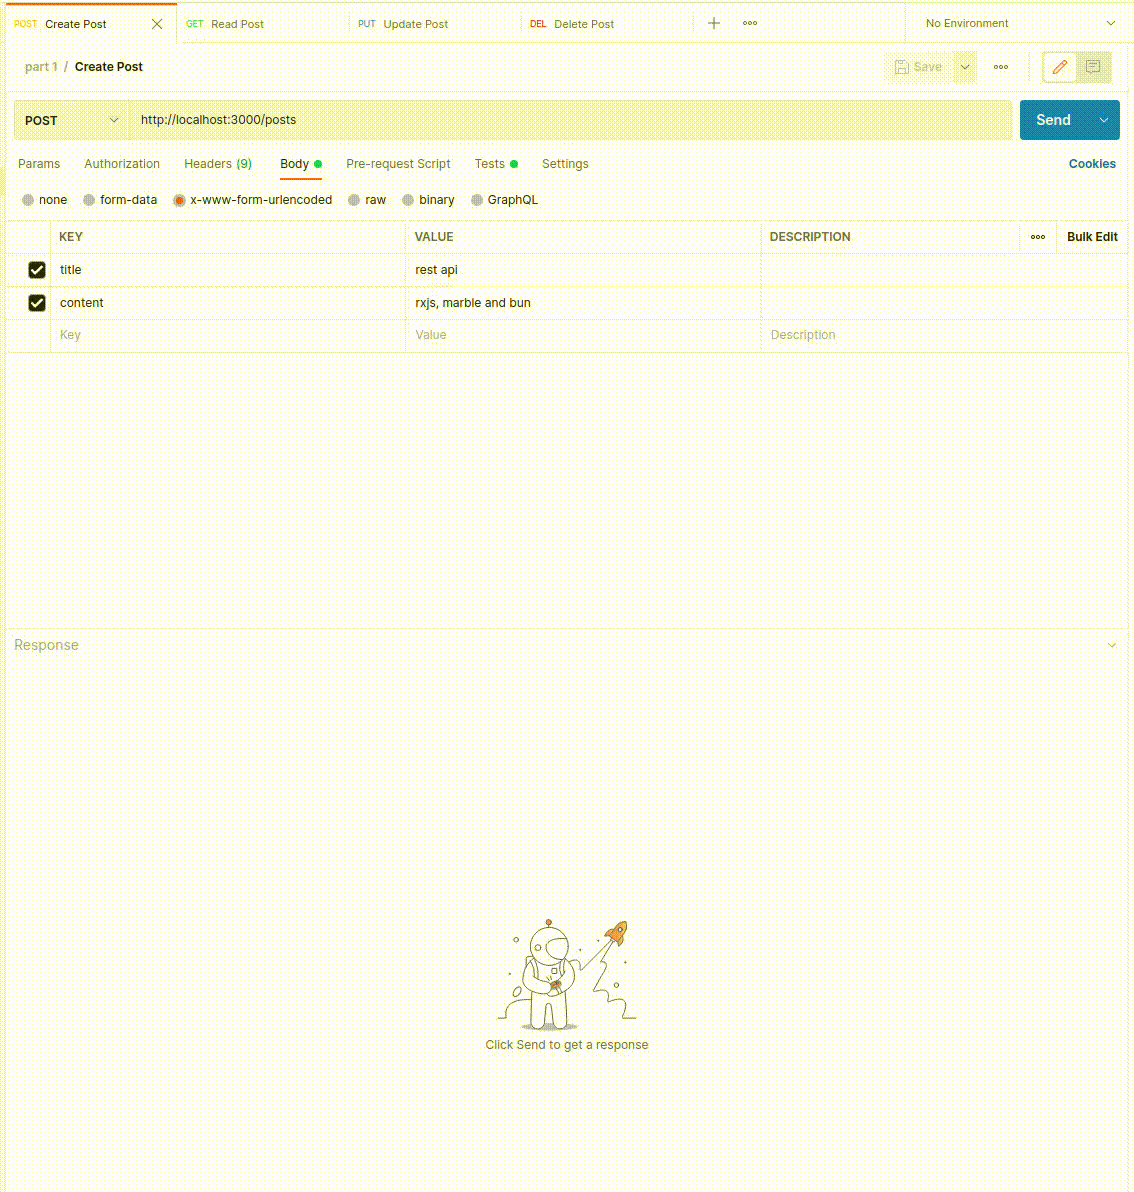
Next, let's add an endpoint to create posts.
1 2 3 4 5 6 7 8 9 10 11 12 13 14 15 16 17 18 19 20 21 22const createPost = (input: PostCreateDto) => { const post: Post = { id: createID(), title: input.title, content: input.content, createdAt: new Date(), }; posts.push(post); return of(post); } const createPost$ = r.pipe( r.matchPath("/"), r.matchType("POST"), r.useEffect((req$) => req$.pipe( mergeMap((req) => createPost(req.body as PostCreateDto)), map((body) => ({ body })) ) ) );
We call createID() function to get a unique ID to differentiate created posts that are stored in the posts array.
We also cast the request body to the required type to satisfy the TypeScript - in future articles, we will explore how to do this better.
READ
Next, we add an endpoint to read posts:
Note that we don't have any validation yet, so the app can be easily broken.
1 2 3 4 5 6 7 8 9 10 11 12 13 14const readPosts = () => { return of(posts); } const readPosts$ = r.pipe( r.matchPath("/"), r.matchType("GET"), r.useEffect((req$) => req$.pipe( mergeMap(readPosts), map((body) => ({ body })) ) ) );
It's a simple effect that returns an array of posts we've created.
UPDATE
Next, we add an endpoint to update our posts.
1 2 3 4 5 6 7 8 9 10 11 12 13 14 15 16 17 18 19 20 21 22const updatePost = (postID: number, input: PostUpdateDto) => { const index = posts.findIndex((p) => p.id == postID); if (index >= 0) { posts[index].title = input.title; posts[index].content = input.content; return of(posts[index]); } throw new HttpError(`Post ${postID} not found`, HttpStatus.NOT_FOUND); } const updatePost$ = r.pipe( r.matchPath("/:id"), r.matchType("PUT"), r.useEffect((req$) => req$.pipe( map((req) => req as typeof req & { params: { id: number } }), mergeMap((req) => updatePost(req.params.id, req.body as PostUpdateDto)), map((body) => ({ body })) ) ) );
Notice that we map our request to satisfy the TypeScript. To do that we use the map operator of RxJS. Next, we took the id parameter and passed it along with the body to the updatePost function. That function searches for a post in the posts array and modifies it. If a post is not found, then an exception is thrown. As a result, this endpoint returns the modified post.
DELETE
1 2 3 4 5 6 7 8 9 10 11 12 13 14 15 16 17 18 19 20 21 22 23const deletePost = (postID: number) => { const index = posts.findIndex((p) => p.id == postID); if (index >= 0) { const id = posts[index].id; posts.splice(index, 1); return of(id); } throw new HttpError(`Post ${postID} not found`, HttpStatus.NOT_FOUND); } const deletePost$ = r.pipe( r.matchPath("/:id"), r.matchType("DELETE"), r.useEffect((req$) => req$.pipe( map((req) => req as typeof req & { params: { id: number } }), map((req) => req.params.id), mergeMap(deletePost), map((id) => ({ body: { id } })) ) ) );
The delete method is similar to the update method. But here we don't have a request body. A post is deleted by its ID. As a result, this endpoint returns the ID of the deleted item.
Gluing it all together
Now we expose our effects so we can use them.
1 2 3 4 5 6export const postsApi$ = combineRoutes("/posts", [ readPosts$, createPost$, updatePost$, deletePost$, ]);
Note that we grouped all effects under the /posts path. This will produce the following endpoints:
- GET:/posts
- POST:/posts
- PUT:/posts/:id
- DELTE:/posts/:id
And here is how our API works
Summary
In this article, we saw in action a simple REST API that utilizes RxJS thanks to Marable.js that's running on Bun.
Now that we have our app set and running we can move to the next part, where we will add some users, JWT authorization, and input validation.
Still having some questions? Consult trusted specialists from Kraków. Your software development company of choice.
Sources
Marcin Zawada
Backend Developer
Share this post


