Kasia Michalska
UX/UI Designer
2024-02-09
Updated: 2024-02-12
#Design
Time to read
8 mins
In this article
Overview
Project background
About the UseBerry tool
Preparation phase
Where to find testers
How to analyse findings
Conclusion
Share this article
Introduction
Whether you are a solo designer in your company, part of a small team, have a tight budget, or lack the time to organize a professional, moderated, comprehensive usability testing - this article is for you.
I'll be focusing on sharing how my team and I approached conducting usability testing on a small scale: limited features, a dozen or fewer testers, a few days, and no extra budget - just the regular working time.
Project background
While developing a new application for our client, we decided to conduct our first usability testing. It was during the wireframing phase that we wanted to check the reactions to some of the key features we were designing. The second usability testing occurred a few months later while designing a complicated flow. After a dozen rounds of iterating on the design, we agreed that external insights were necessary. We wanted to verify if what we thought worked actually did, and if users behaved and followed the paths we assumed they would. At this point, we were already anticipating some of the outcomes, but hard proof was needed to convince our client that a semi-radical change in design and information architecture was necessary.
Request a free design consultation
Facing design challenges? Contact us for a free consultation in just 1 step!
About the UseBerry tool
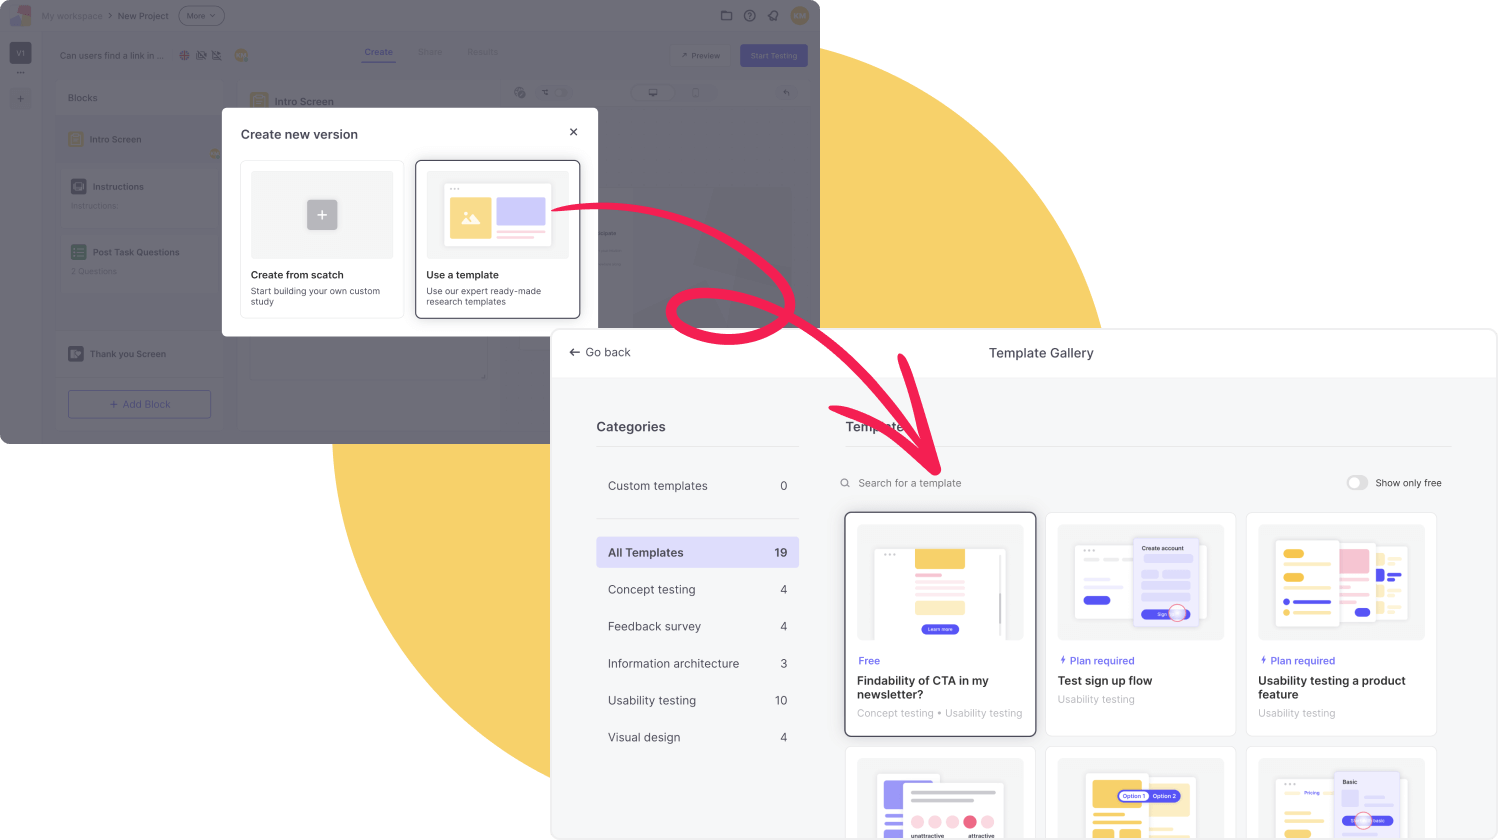
Our attention was drawn to a tool called UseBerry. We can create a free account and use it to a limited extent, but for small-scale usability testing, it should be sufficient. The free plan allows for 10 responses from testers per month, 1 project, and 3 versions per project. After setting up an account and creating a workspace, we are ready to create a project, where all the exciting work begins. We can start a project from scratch, but pre-made templates are also available. You can find them in the Template Gallery after creating a new version of your project.
Preparation phase
Preparation outside UseBerry (inside a design tool of your choice)
Usability testing is typically conducted using several prototypes, including the flow we intend to test. The first step is to prepare everything, including the prototype. The most effective way to test a feature or flow is to provide the tester with access to the entire app or a significant portion of it. This prevents scenarios where a non-clickable UI element accidentally guides the tester to our preferred execution of the task. The more paths and corners the tester explores, the more reliable the outcomes of the task execution.
However, we must be aware of the curious nature of humans and ensure that the tester understands they should focus on the task at hand rather than exploring every corner of the app. This can potentially lead to assuming that ✨a curious wander through the meanders of a feature✨ is actually an inability to find or execute a given task.

Another preparation step is to write scenarios or tasks. This depends entirely on the nature of our project and what we aim to test. Some points to consider when preparing scenarios for testing: tasks should be written concisely and clearly, we should avoid leading or misleading the tester with our wording, and no clues should be given regarding the execution of the task. Here are some examples of how a task title can be structured:
- “Add a product to your cart”
- “Change your password”
- “Fill in information about your address”
- “Book a trip to Paris”
- “Report an issue with your order”
We should avoid providing a designated location or a specific method to execute the task. As an addition, we can actually provide instructions or a background story for the task. This may include why the task is important, how the user ended up in this situation, or additional details regarding the task. However, the title should be clear enough that even without reading the description, the user can successfully complete the task.
Preparation inside UseBerry
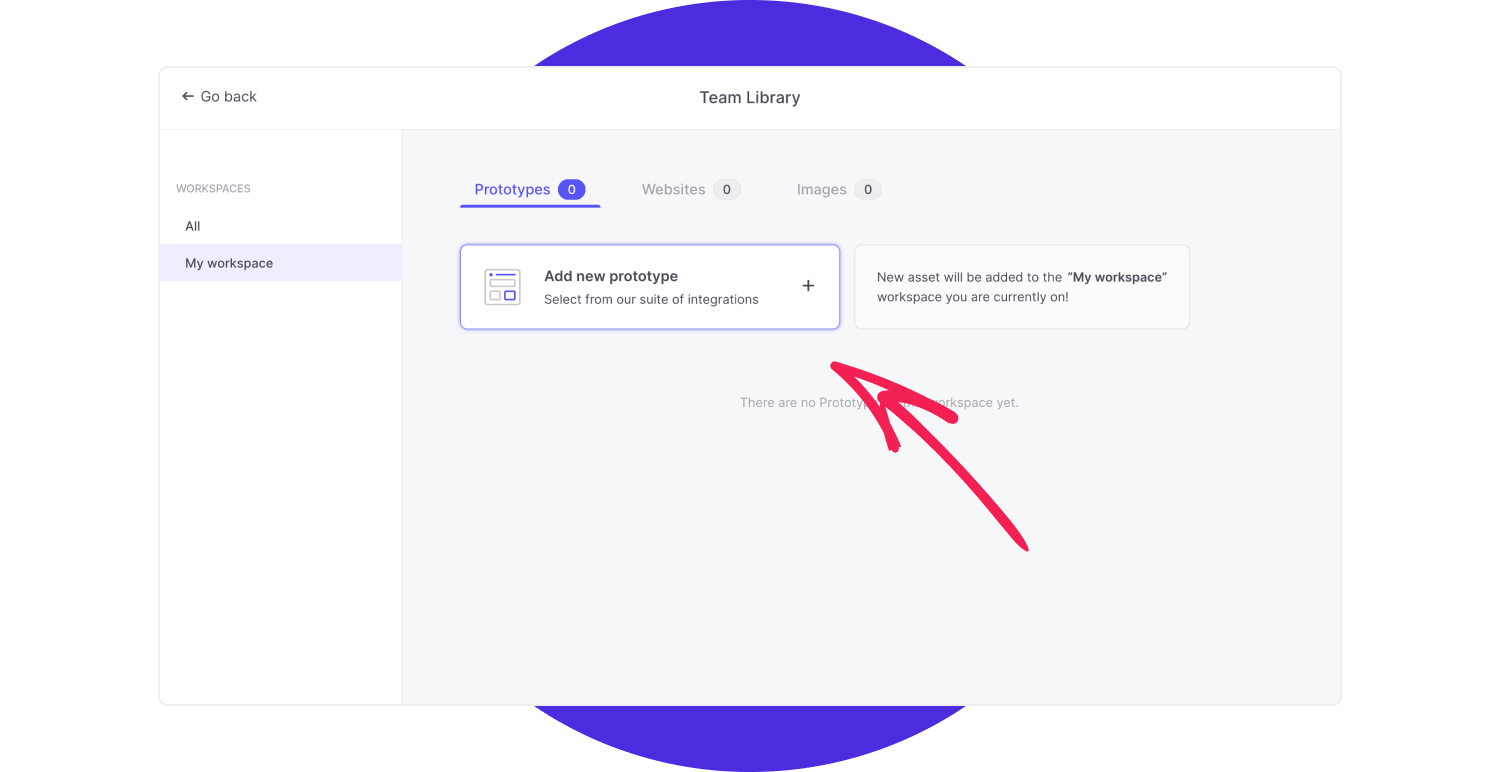
Once our prototype is ready and tasks are written, we can upload them to UseBerry. The prototype can be uploaded either directly from the website or via the Figma plugin. Everything we send will be stored in our Team library.
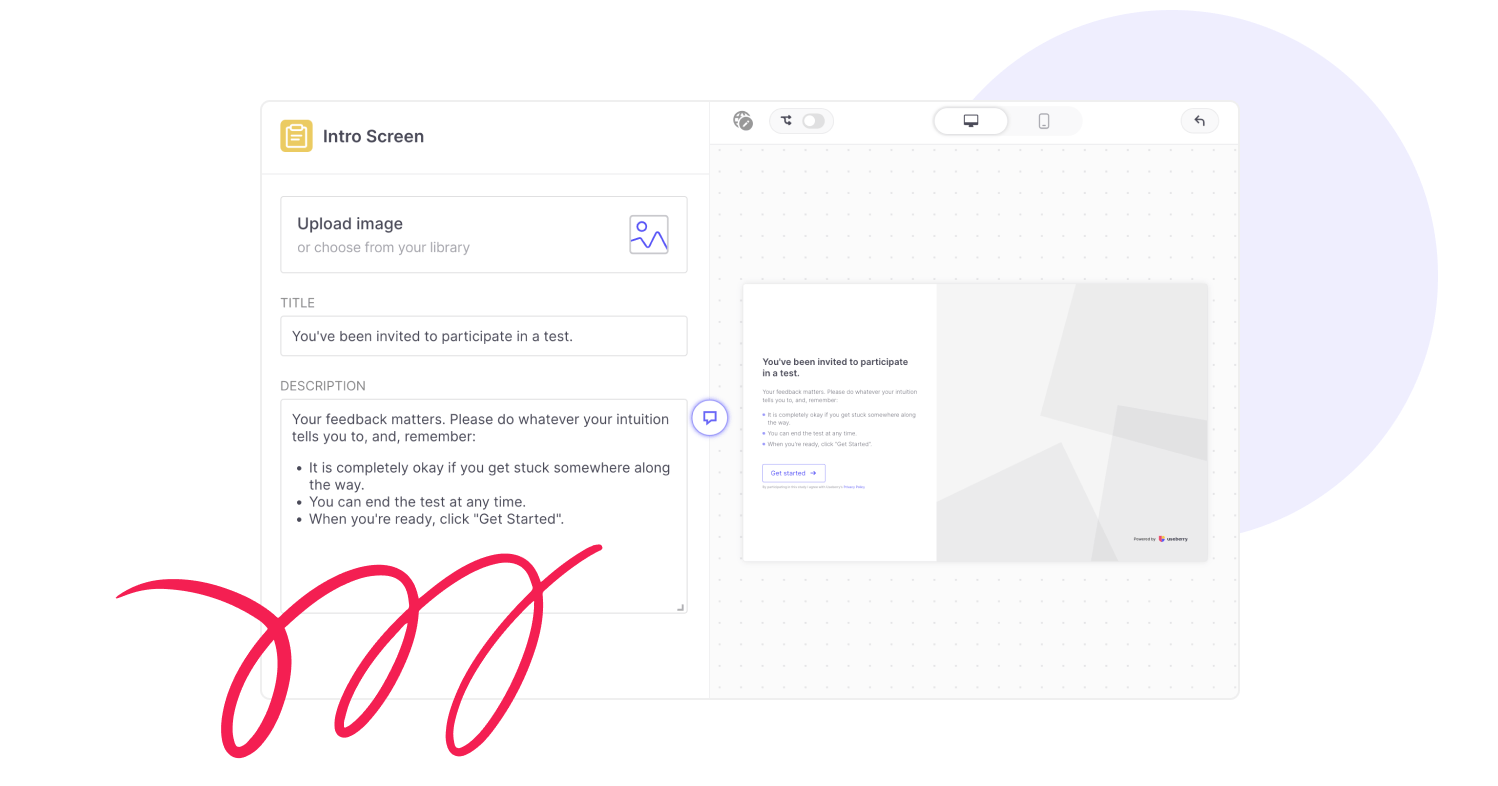
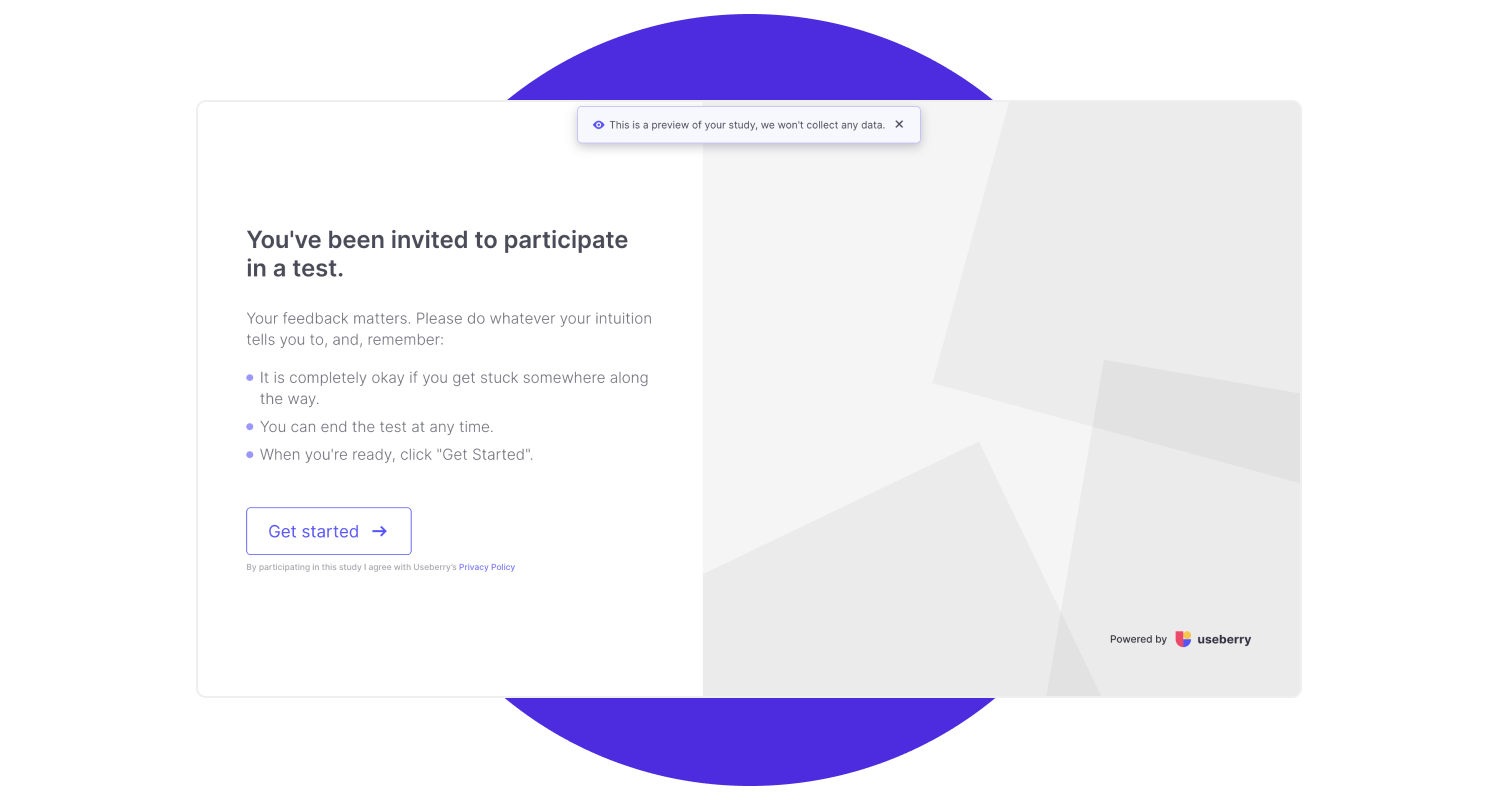
In the side panel, we have a variety of blocks to build our testing journey. The Intro and Thank You screens serve as a good way to inform our participants about what they can expect and to express gratitude for their time and effort. Additionally, we can include rules, estimated execution time, and privacy statements if our study is anonymous. A good and concise example is provided in the template we selected at the beginning.
The other blocks allow us to check a single task, multiple tasks at once, ask free-text questions, measure usability with the System Usability Scale (SUS) questionnaire, check preferences, demographics, first clicks, or ask Yes/No questions.
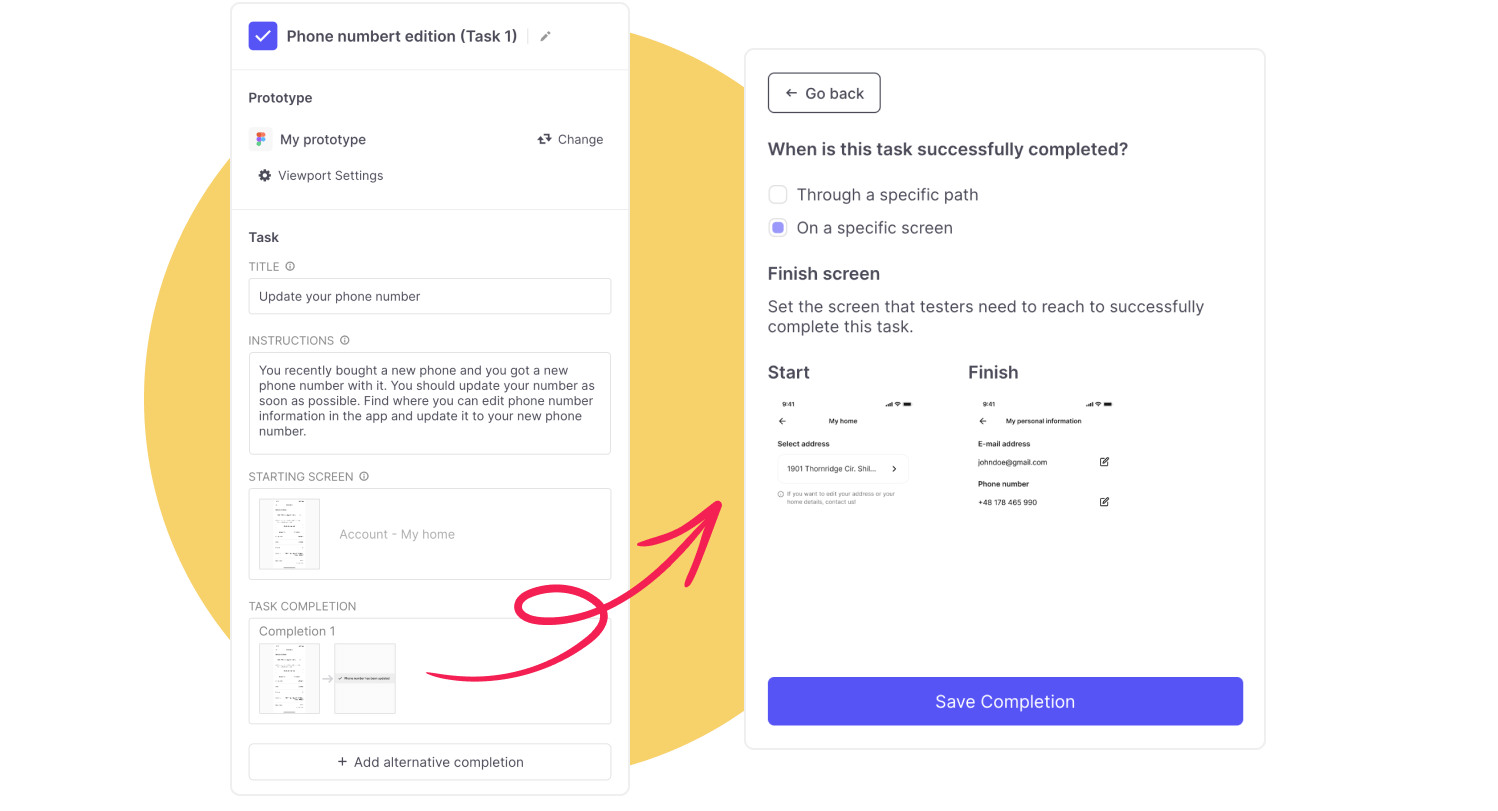
To fully set up our testing experience, we just need to connect the prototype to a block, fill in the title and instructions, and specify when the task can be considered completed successfully. We have two options here: when the testers follow a specific path or when they reach the selected screen. Depending on the scenario and project, both options can provide insightful results. Personally, I prefer setting up completion based on a specific screen, as it allows our testers to explore and find their own way to succeed in a task, which may differ from what the designer considers the optimal or correct way.
When everything is set up, we can perform one final check before publishing the test to a broad or small audience. The 'Preview' option is excellent for assessing the end tester's experience and identifying any bugs, typos, or missing connections in our prototype. These run-throughs do not collect any data, allowing you to thoroughly pre-check your usability testing. You can also invite others, who will not participate in the final testing, to identify errors and suggest improvements.
Publishing
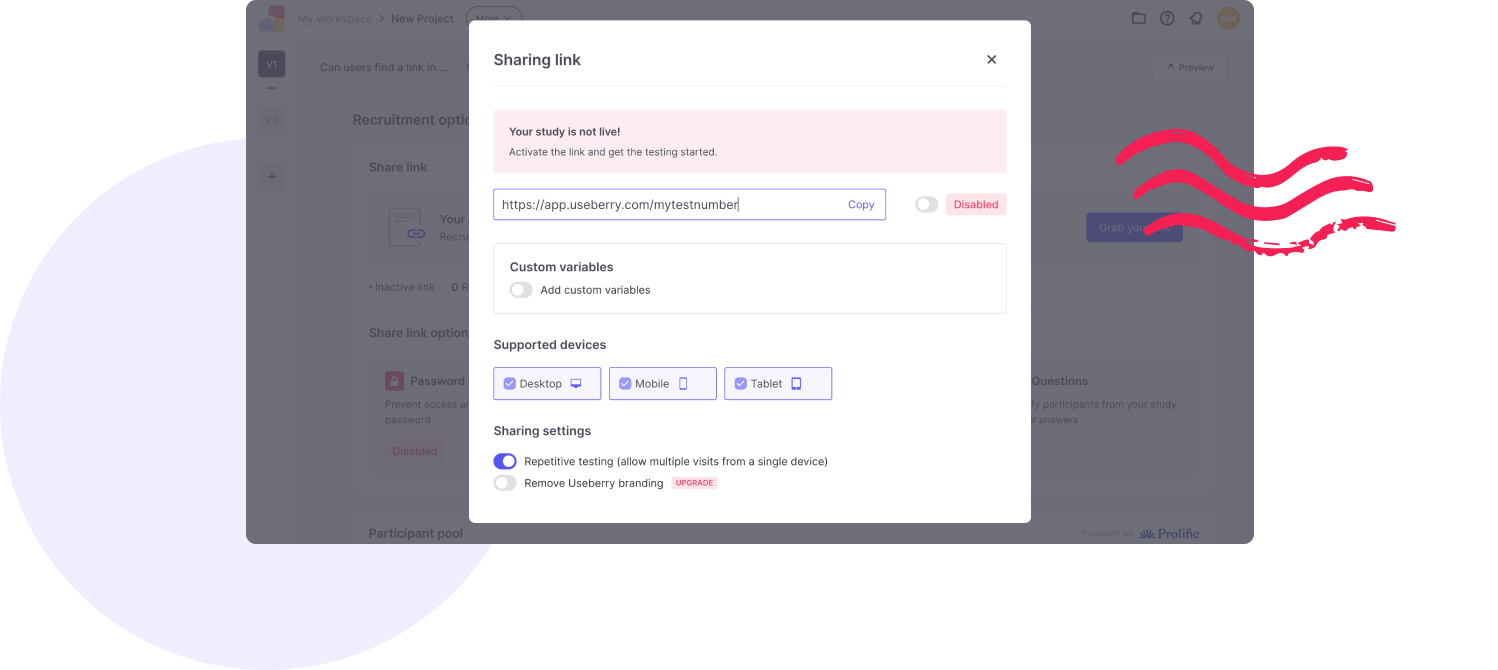
The last step of the preparation phase and also the first step into actual feedback gathering is to publish the usability testing. This is very easy and straightforward. If we're sure our testing is ready to be sent to the testers, we simply enter the 'Share' tab, which offers many options regarding the testing experience. We can enable session recording, set up testing language, capture video shots of testers, and implement protection measures such as passwords. Additionally, we can add custom variables if we want to create groups with testers from different backgrounds to better understand how different groups may exhibit varying behaviors and execution patterns. Finally, we enable the link and send it to the testers.
Where to find testers
Finding people willing to test the functionality may be challenging, and finding people who are willing to do so for free is even more difficult. So, what can we do with no budget, little to no time, and no group of friendly testers waiting around?
One option may be to look closer rather than further. We cannot enlist our project colleagues to perform the test, as they may already be familiar with the feature or information architecture. However, there may still be some colleagues who have not been involved in the project and can be invited to participate in the testing. Additionally, if we have a client we're working for, it's worth asking whether people from the client's company are willing to help. Individuals from departments outside of IT, such as HR, Marketing, Operations, Sales, and Finance, can provide a range of insights and help eliminate industry bias from the testing process.
If your project is not under a non-disclosure agreement (NDA), you may reach out to your private friends and groups on social media. Since we're still discussing small or no-budget testing, I won't include testing agencies or other types of testers' recruitment processes.
How to analyse findings
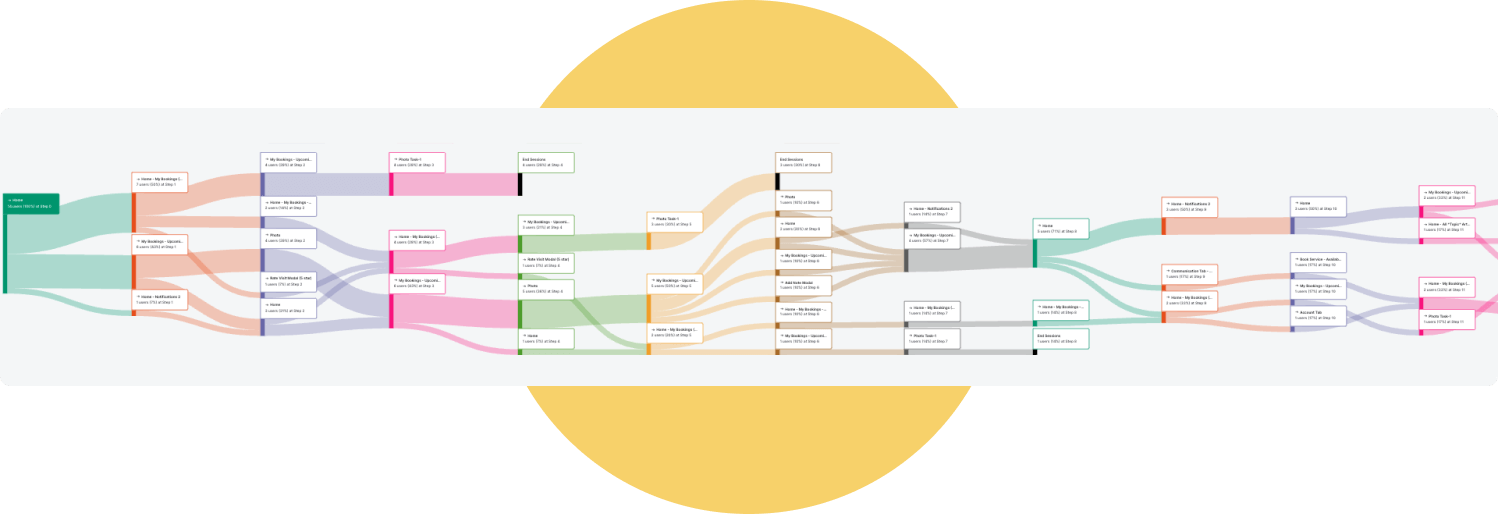
After all of the invited testers have finished their sessions or when we decide to conclude the testing, it's time to analyze the findings. We can approach this in many ways. In the 'Results' tab, we are provided with a range of metrics to compare each tester's session. Initially, we receive a generic overview of the number of users who completed the study, users who dropped off, and the overall average execution time. If our pool of responses is not very large, we can “theatre play” and track step-by-step how each tester attempted to solve the task. More generalized results can be observed in the User Flows section, where we obtain a visual representation of the path taken by each user, including any branching off along the way to the final screen.
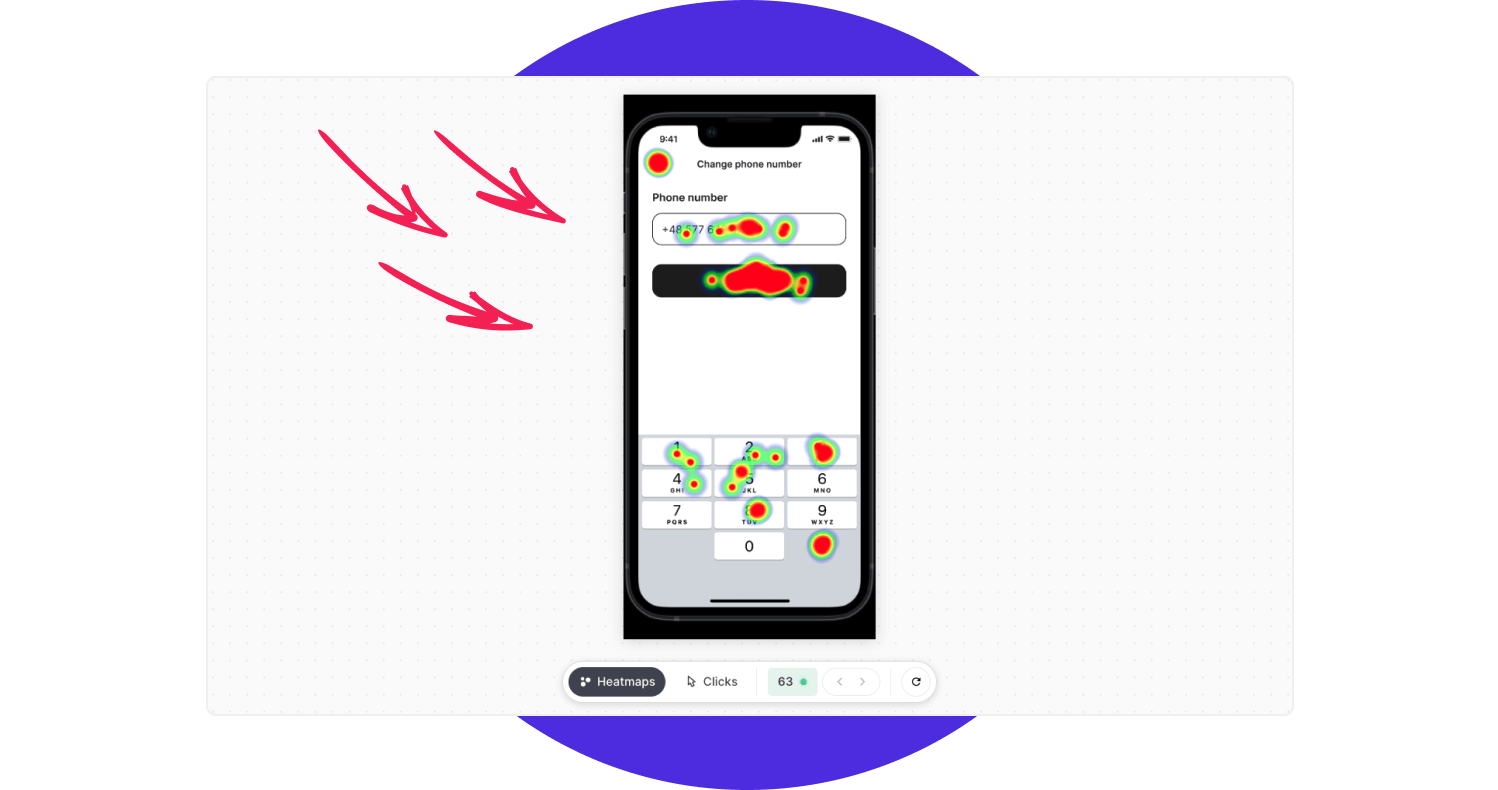
The heatmap is another tool to gather metrics about our testers' sessions. It allows us to identify the most common patterns in user behavior and the elements they gravitated towards the most when navigating the interface. Each of these tools will be helpful in different ways; some may be the only thing you really need, while others may be completely useless—or anything in between. If you haven't received too many responses—could be up to 15—you can go through each tester's path in a relatively short time. The generic and average metrics can then serve as additional data.
When reviewing the playback of sessions, it's helpful to formulate a set of questions and create a spreadsheet to document each tester's path. This allows us to identify which tasks or screens presented the most challenges for testers. Additionally, we can add comments to further describe our observations. Based on this analysis, we can easily document what we learned, what needs to be improved, and why. This serves as a foundation for iterating on the design. If necessary, we can repeat the usability testing process to validate improvements.
Conclusion
It's great when designs are based on user feedback and research. Even a small study can go a long way if executed properly. Each response can reveal the biases inherent in our decisions—biases we may not even be aware of. However, as designers, we also need to know when to rely on our experience and expertise. Users may initially resist changes to elements they were accustomed to, but in the long run, they may benefit from and become familiar with the new interface. We must use our best judgment and not be afraid to make mistakes, whether during wireframing, the high-fidelity stage, or testing. After all, errors are a fast but often unpleasant way to learn a lesson. May your usability tests produce insightful results!
Not sure what is the best approach for your project? Reach us out! We will help you choose the right UX/UI solution. Trust an experienced software development company.
Interest in another field of IT? Check our article: Testing frontend logic with JEST.
Kasia Michalska
UX/UI Designer
Share this post

